A pattern that I think will become increasingly useful in 2019 and beyond is creating a custom template for a SharePoint site or Microsoft Team using Site Designs and a PnP template. It’s a topic that I and many others have already covered in some way, but at this time most of the samples (including the official Microsoft documentation) show using PowerShell in an Azure Function – but this now feels strange since Azure Functions V2 has been released and there is no support for PowerShell. As you might know, it was only ever “experimental” in v1, and it remains to be seen whether Microsoft will resolve the blocking issues they’ve cited (related to V2 function bindings and the PowerShell language). So in this mini-series, let’s walk through what an implementation would look like using an Azure Function written in C#:
- Part 1 - Azure queue, app registration, Flow, Site Design and Site Script [this article]
- Part 2 - the Azure Function, Key Vault, enabling Managed Service Identity, and the PnP template
NOTE: all of the files and code I'm referencing are available for download from this Github repo: https://github.com/chrisobriensp/SiteDesignsAndPnPTemplating
The recipe
Overall the solution elements are:- A SharePoint Site Design (and corresponding Site Script)
- A Flow which adds an item to an Azure Queue
- A SharePoint app registration which allows the code to authenticate to SharePoint and modify the site
- An Azure Function (queue-triggered) which authenticates to SharePoint (using the app registration) and applies a PnP template to the site

The implementation
Phase 1 – Azure things and SharePoint app registration
We have some pre-requisites to set up first – the Azure function app, queue and the SharePoint app registration. I recommend creating these first as you’ll need references from these things to put into later steps (your Flow needs details of the queue for example).So let’s start there..
Creating the queue in Azure
- To do this, navigate to the Azure portal, and then go into an appropriate Storage Account that you have. If you don’t have one already, just create one (it’s a container for Azure storage things such as queues, tables and BLOBs ).
- Once there, go into the “Queues” area and create a new one:
- Also grab the storage key at this point. Go into the area for the storage account in general (not the specific queue we just created), and go into the “Access keys” area:


You’ll need both the queue name and access key later when we come to configure the flow, so keep these details somewhere handy but secure. Your Flow will need to know them so it can put a message on the queue :)
Creating the Azure function app
I won’t go into detail on this step as I’ve covered it elsewhere (e.g. 3 ways to create and debug Azure Functions) – but fundamentally we want to create the function app upfront to reserve the URL in Azure. We don’t have to do anything else at this stage. But it’s a good idea to do it early, as it would be annoying to specify the URL in one of the steps (e.g. registering the SharePoint app) only to find out that out someone else has taken it and you need to re-do lots of the config.Of course, creating the function app in the Azure portal is probably the simplest way. I tend to just click the big “Create” button and search for “function app”:


Click the “Create” button when you’ve found the item.
This will then take you to the place where you can supply the details. The important things really are to:
- Use a URL that makes sense for what you’re doing
- Ensure you’re on the Consumption Plan
- Associate the function app with a storage account related to this solution

You’ll need to decide whether you’re creating a new Resource Group for this stuff, or whether it fits with one you already have. Again, this is just standard Azure app service stuff and there are lots of documentation and articles to help with these decisions if needed.
Click “Create” when you’re ready. Ensure the function app gets created successfully, and make a note of the URL you used – you can get it back from listing the App Services you have in Azure if needed.
Creating the SharePoint app registration
To do this, we use SharePoint’s AppRegNew.aspx page to register our app. Remember this authentication approach results in a token that can only be used against SharePoint (as opposed to the Graph or other areas of Office 365), but that’s all we need when templating SharePoint sites – even if it happens to be a site which belongs to a Microsoft Team.- Navigate to the AppRegNew.aspx page in the root site collection of your tenant – so https://YOUR_TENANT_HERE.sharepoint.com/_layouts/15/appregnew.aspx
- Fill in the details for the app:
- Client ID and Client Secret can be new identifiers from the “Generate” button.
- The Title should be something you’ll recognise as belonging to this solution e.g. “Site Design Provisioning” or similar.
- The App Domain and Redirect URI should reflect the URL you used earlier for the function app – the former has the domain, the latter is qualified with “https://” at the beginning:

- Ensure you see the confirmation message – when you do, keep these details safe:

Grant admin consent for the app
Anyway, assuming that we'll stick with SharePoint app authentication, the next step is to trust the app, so that it has the appropriate access to your tenant:- Go to
https://[yourtenant]-admin.sharepoint.com/_layouts/appinv.aspx(notice the-adminin the URL). - In the App Id field, paste the Client ID that you copied, and choose Lookup.
- In the Permission Request XML field, paste the following XML:
<AppPermissionRequests AllowAppOnlyPolicy="true" >

   <AppPermissionRequest Scope="http://sharepoint/content/tenant" Right="FullControl" />


</AppPermissionRequests> - Click Create:

- To confirm that you want to trust this app, choose Trust It:

The Flow
The Flow itself is extremely simple. All you need is:- A HTTP trigger
- A “put a message on a queue” action
- Go to the Flow portal in Office 365 and in the “My Flows" are click New > Create from blank:

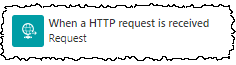
- Add a “When a HTTP request is received” trigger. To do this, search for “http” using the search box:

- Find the “When a HTTP request is received” trigger and select it to add it to the Flow:
- Enter the following as the request body:
- Click “New step”, and type “queue” into the search box. Find and select the “Azure Queues” item:

- From there, select the “Put a message on a queue” item:

- Assuming you don’t already have a connection to your Azure storage account defined, click the ellipses (…) on the action in the flow and find the “Add new connection” item:

- Enter the details of the storage account name and key in the boxes shown (we’ll select the actual queue within this storage account in a second). Note that the connection name can be anything meaningful – but the connection itself is to the overall storage account, so it’s a good idea to include that in the name perhaps:

- Click “Create”.
- The Flow action should now let you select the specific queue, and also what details to put on it. Select the queue you created from the dropdown, and for the "Message” value, select “webUrl” from the HTTP request action:

- You should end up looking something like this:

- Click in the Flow name near the top left of the screen, and rename your Flow to something sensible:
- Finally, click “Save” to save the Flow:

Obtain the URL for your Flow
You’ll need the URL of your Flow to put into your site script. To obtain it, follow these steps:- Go back in to edit your Flow.
- Edit the “when a HTTP request is received” activity, and grab the HTTP POST URL that’s specified (there’s a ‘copy to clipboard’ button to the right):

- Store the URL somewhere safe, ready for the next step.
The Site Design and Site Script
As you’ll remember, a Site Design is effectively a “registration” of sorts which is made up of one or more Site Scripts (JSON definitions of what should be provisioning into the site). So you can effectively share site scripts amongst many site designs if needed. Here’s a sample site script which:- Applies a theme named ‘COB purple’ which I’ve previously defined in my tenant – see http://aka.ms/spsitetheming for more details on modern SharePoint theming
- Calls my Flow using it’s URL – I’ve edited the site script to paste in my Flow URL from the previous step
- Provisions a couple of custom lists (one with a custom column) and adds them to the site navigation
- Configures JSON column formatting on some columns
So that’s a site script. You’ll need to register both the site script and the site design using some PowerShell like the below.
Step 1 – register the site script:
You'll get an output something like this:
Id          : be7c02a8-9134-4961-921a-cffc4772e97c
Title       : COB project site script
Description :
Content     :
Version     : 0
Copy the ID that was returned as we'll need it in the next step. When we register a site design, we need to point to one or more site scripts that comprise the provisioning steps - so paste it into the next bit of PowerShell you need, as I've done below:
You'll now get an output something like this:
Id                  : ef49c695-b5e3-49ef-afba-ef053ca61414
Title               : COB project site
WebTemplate         : 64
SiteScriptIds       : {be7c02a8-9134-4961-921a-cffc4772e97c}
Description         : Creates a COB project site with a theme applied
PreviewImageUrl     :
PreviewImageAltText :
IsDefault           : False
Version             : 1
Success! Your site design and site script have now been registered, and it's hooked up to the Flow. However, we're not done yet - we still need our C# Azure Function which will actually do the work of applying the PnP template :) We'll do that in the next post..
Part 2 - the Azure Function, Key Vault, enabling Managed Service Identity, and the PnP template


No comments:
Post a Comment